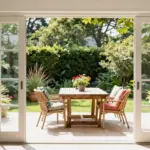
Creating a beautiful outdoor space can feel daunting, especially when it comes to installing a brick paver patio that remains level and doesn’t shift over time. If you’ve been dreaming of transforming your yard into a charming oasis, you’re not alone. The truth is, so many of us crave that perfect blend of functionality and aesthetics in our outdoor living spaces. That’s why I put together this guide filled with ideas that not only look great but also stand the test of time.
If you’re a DIY enthusiast or simply someone who loves a well-designed yard, this post is for you. You care about making your outdoor area a welcoming spot for family and friends, and I get that. Each idea I’ve compiled here focuses on practical solutions for sloped yards. You’ll find designs that capture a variety of styles, from rustic to modern, that will surely inspire your next project.
By the end of this post, you’ll have 15 creative paver patio design ideas that will keep your space looking pristine year-round. Plus, I’ll share tips on patio maintenance, ideal outdoor flooring options, and innovative landscaping ideas to complement your new patio. Let’s jump in and get your outdoor dream started!
Key Takeaways
– Discover 15 brick paver patio ideas that are designed to stay level, even on sloped terrains, ensuring a beautiful outdoor area for years to come.
– Learn how to integrate elements like fire pits and built-in seating into your design for a more functional space that enhances your outdoor living experience.
– Explore various paver patio designs ranging from geometric patterns to rustic herringbone, catering to different tastes and styles.
– Uncover practical advice on patio maintenance tips to keep your paver patio in top shape, no matter the season.
– Get inspired with landscaping ideas that include integrated planters and stylish borders, adding that finishing touch to your new patio setup.
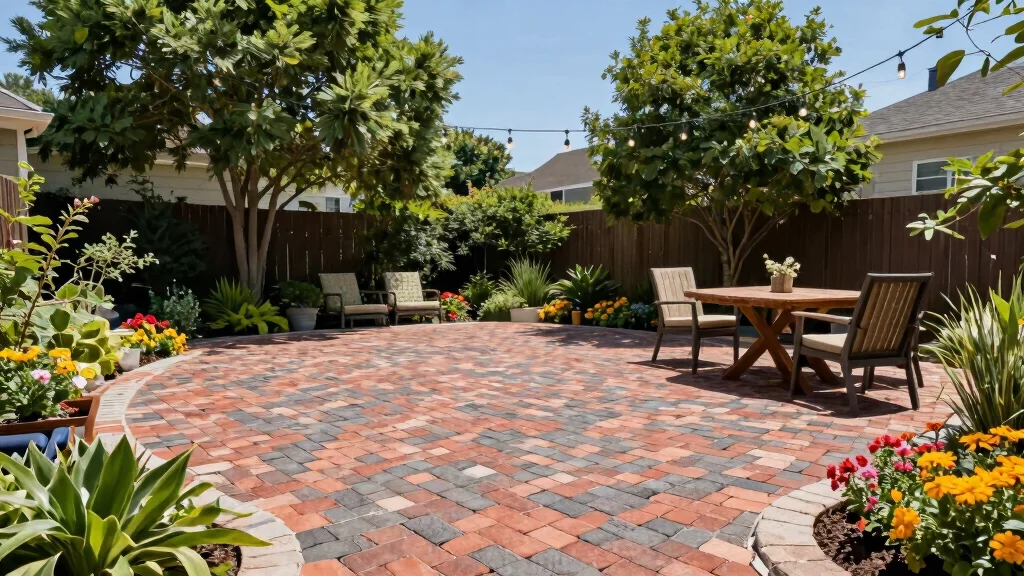
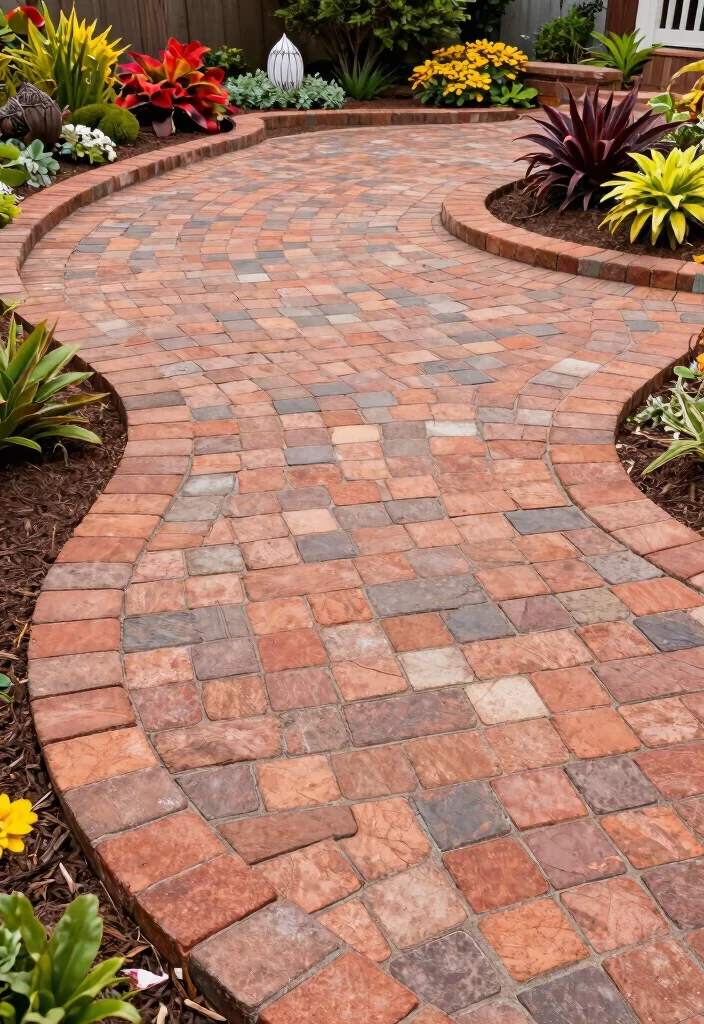
1. Rustic Charm with a Herringbone Pattern
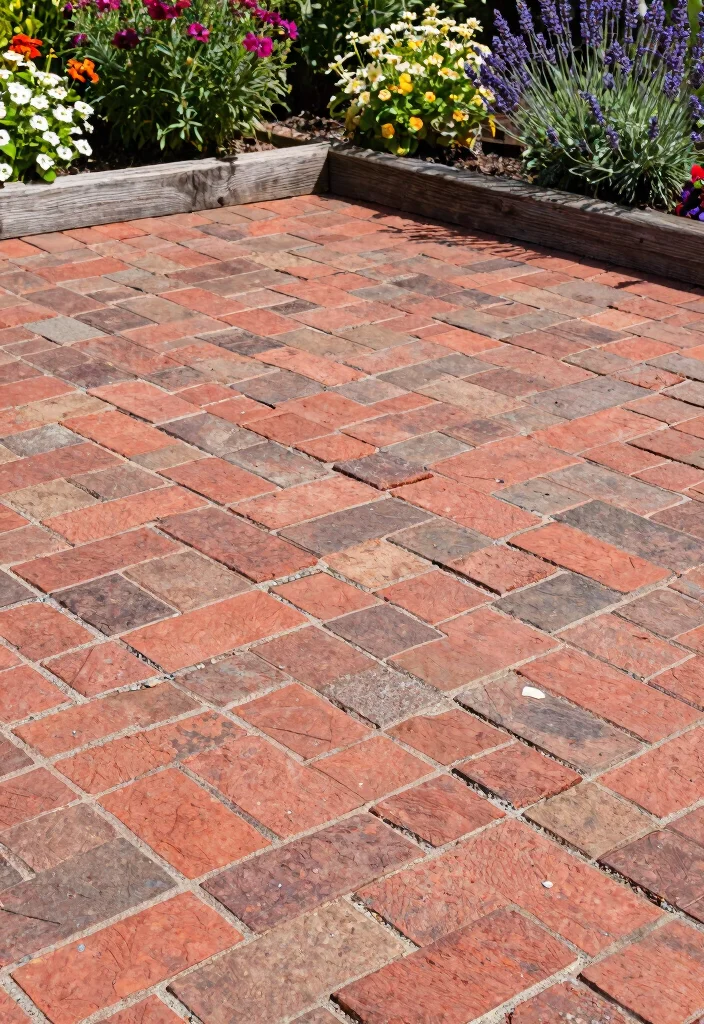
The herringbone pattern embodies rustic charm, making your patio feel inviting and timeless. This classic layout features bricks laid at 45-degree angles, creating an engaging zigzag effect that not only captivates the eye but also promotes effective drainage. For instance, pairing warm-toned bricks with natural stone can enhance the earthy vibe while ensuring water flows away from your home.
To implement this design, ensure a well-compacted base to support the bricks’ weight. Mixing brick colors adds depth, creating an aesthetic that’s both dynamic and cohesive. Filling gaps with gravel introduces texture and further improves drainage capabilities.
Consider these tips to maximize your herringbone design:
– Pair warm-hued bricks with contrasting stones for depth
– Install a compacted gravel base for stability
– Use decorative edging to define the space
This approach infuses sophistication and warmth into your patio, while the textures of the bricks and gravel enhance the overall aesthetic.
Difficulty Rating & Requirements
Overall Difficulty Rating: Medium
Creating a brick paver patio requires a fair amount of planning and physical work, giving it a medium difficulty rating. It’s suitable for DIY enthusiasts with some experience in outdoor projects. If you’re comfortable using tools and following a structured plan, you can successfully complete this project.
Time Estimate:
⏱ Estimated time: 2-4 days
– Preparation and Planning: 1 day for designing and gathering materials.
– Excavation and Base Layer Installation: 1 day to dig and lay the base.
– Paver Installation: 1-2 days depending on the size and complexity of your design.
– Finishing Touches and Clean-up: 1 day for checking levels and final adjustments.
Skill Requirements:
– Required skills: Basic masonry skills, level measurement, and some landscaping knowledge.
– Beginner-friendly: No, but with the right guidance, beginners can learn essential skills.
– Skills that can be learned include basic brick laying and proper leveling techniques. Some experience with outdoor projects is beneficial.
Tools & Materials Needed:
🧰 Essential items checklist:
– Brick pavers: Required
– Crushed stone or gravel: Required for the base
– Sand: Required for leveling between pavers
– Tampers or plate compactor: Required for compacting base materials
– Level: Required to ensure the patio is even
– Rubber mallet: Required for adjusting pavers
– Edging restraints: Optional for more defined edges
– Gardening gloves: Optional for protection during installation
Step-by-Step Overview:
1. Planning and Design: Spend a day sketching your patio layout and gathering your materials. This is your blueprint; take your time to ensure everything fits.
2. Excavation: Clear the area for your patio, digging down about 6-8 inches to prepare a solid base. This phase usually takes one day.
3. Base Installation: Lay down the crushed stone or gravel and compact it well. Add a layer of sand on top to create a smooth surface for your pavers. Allow about a day for this phase.
4. Paver Installation: Begin laying your pavers according to your design. Use the level frequently to ensure they are even. This step can take a day or two, depending on complexity.
5. Finishing Touches: Fill gaps with sand, compact the pavers, and clean the area. This final phase usually takes a day. Be sure everything looks good and is well-leveled before you finish up!
Professional vs DIY:
Considering the costs, hiring a professional can range from $10 to $30 per square foot, depending on the complexity of the design and local labor rates. For a DIY approach, costs drop to around $6 to $15 per square foot, including materials. If you love DIY projects and have the time, this can be a rewarding experience. However, if you’re unsure about your skills, it might be worth hiring a pro to ensure a perfect finish.
2. Circular Fire Pit Integration
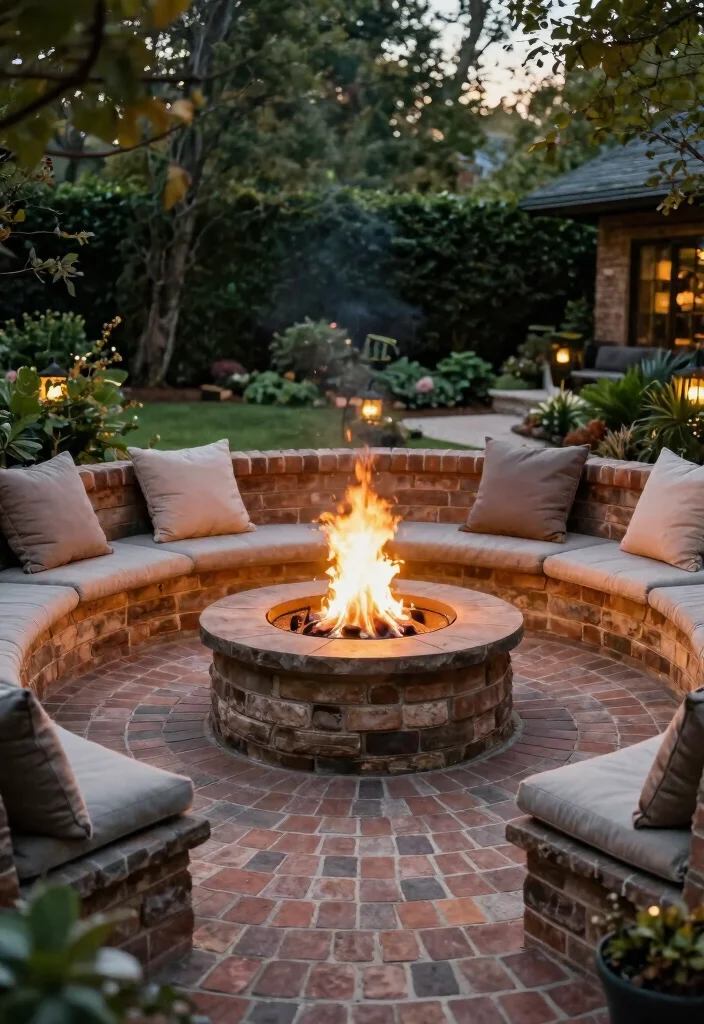
Integrating a circular fire pit within your brick paver patio creates a cozy gathering spot perfect for evening relaxation. Arranging pavers in a circular shape around the fire pit not only enhances the visual appeal but also ensures stability and warmth during chilly nights. For added cohesion, select a fire pit that complements your patio’s color scheme, using larger stones for a robust and inviting presence.
When planning your fire pit area, surround it with comfortable seating to foster conversation and connection. Regularly check the surrounding bricks for any shifting, especially after heavy rains, and replace damaged stones to maintain both safety and aesthetics.
Here are some practical ideas for your fire pit:
– Install larger stones around the fire pit for stability
– Use comfortable seating for conversation and warmth
– Choose a fire pit that matches your patio’s colors
This design not only offers a stunning focal point but also enhances your outdoor ambiance, inviting warmth and togetherness.
3. Elevated Multi-Level Patios
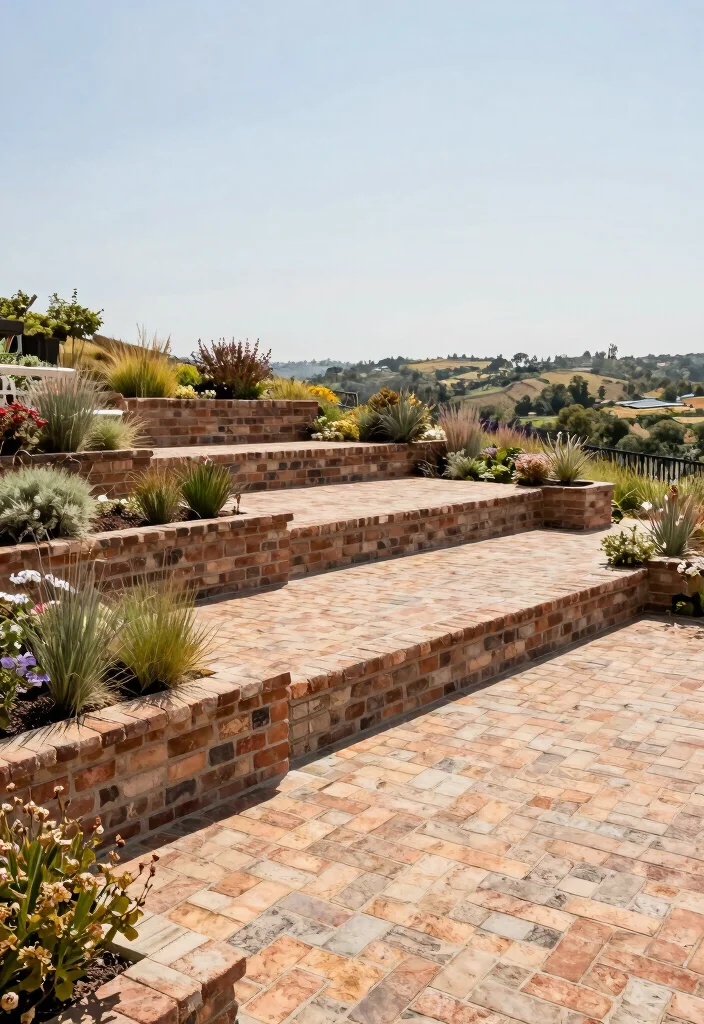
Elevated multi-level patios are perfect for sloped yards, effectively utilizing space while ensuring stability. By constructing retaining walls with bricks, you can create distinct levels for dining, lounging, or gardening, adding both functionality and visual interest. Each level serves a unique purpose, inviting different experiences in your outdoor space.
Ensure proper drainage is in place for each level to avoid water accumulation. Using a mix of brick sizes and colors adds character while maintaining structural integrity. Incorporate steps made from matching pavers for a seamless transition between levels.
Consider these tips for your multi-level design:
– Use retaining walls to define each level
– Incorporate steps for easy access
– Plant native flowers to enhance beauty and prevent erosion
This approach not only adds aesthetic value but also enhances practical use, all while ensuring your patio remains stable and beautiful.
4. Geometric Designs for Modern Appeal
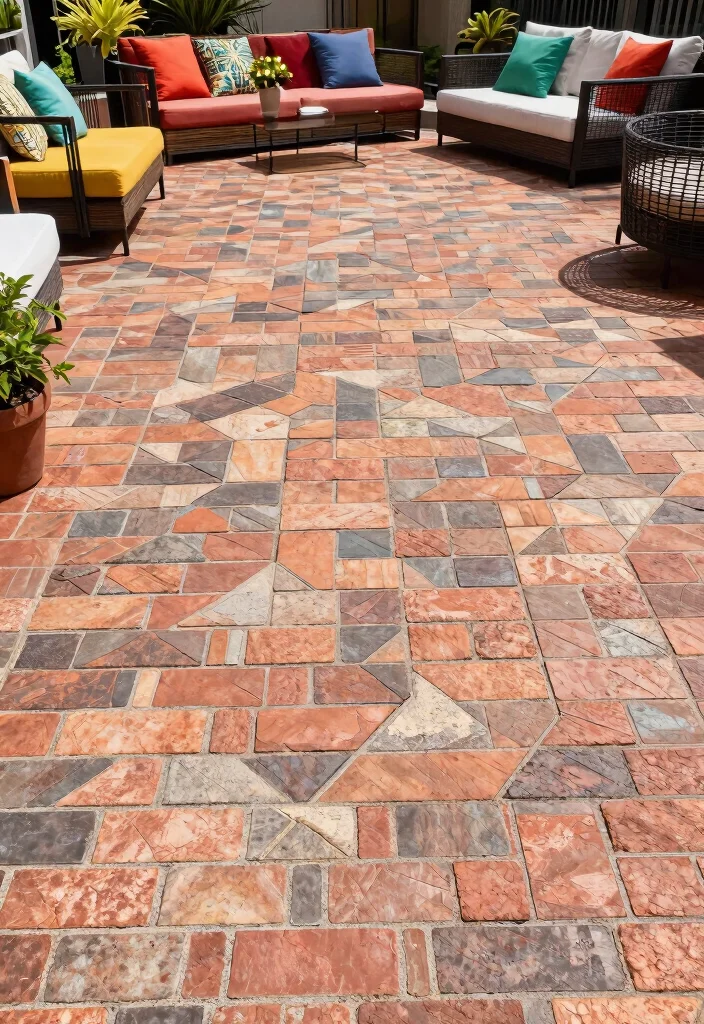
Geometric designs can infuse a modern twist into your brick paver patio, making it a standout feature of your outdoor space. Think beyond traditional shapes by incorporating triangles, hexagons, or larger square bricks arranged in eye-catching patterns. This contemporary approach is especially effective in minimalist outdoor living areas.
To keep everything level, outline your geometric design with stakes and string lines before laying the pavers. A solid base of compacted gravel enhances stability, while mixing contrasting colors or textures can elevate the overall design.
Explore these ideas for geometric patterns:
– Use triangles and hexagons for dynamic shapes
– Lay pavers in a way that complements your home’s style
– Mix colors for added visual interest
This design choice brings a fresh, stylish energy to your patio, while the varied textures enhance its allure.
5. Brick Paver Pathways Leading to the Patio
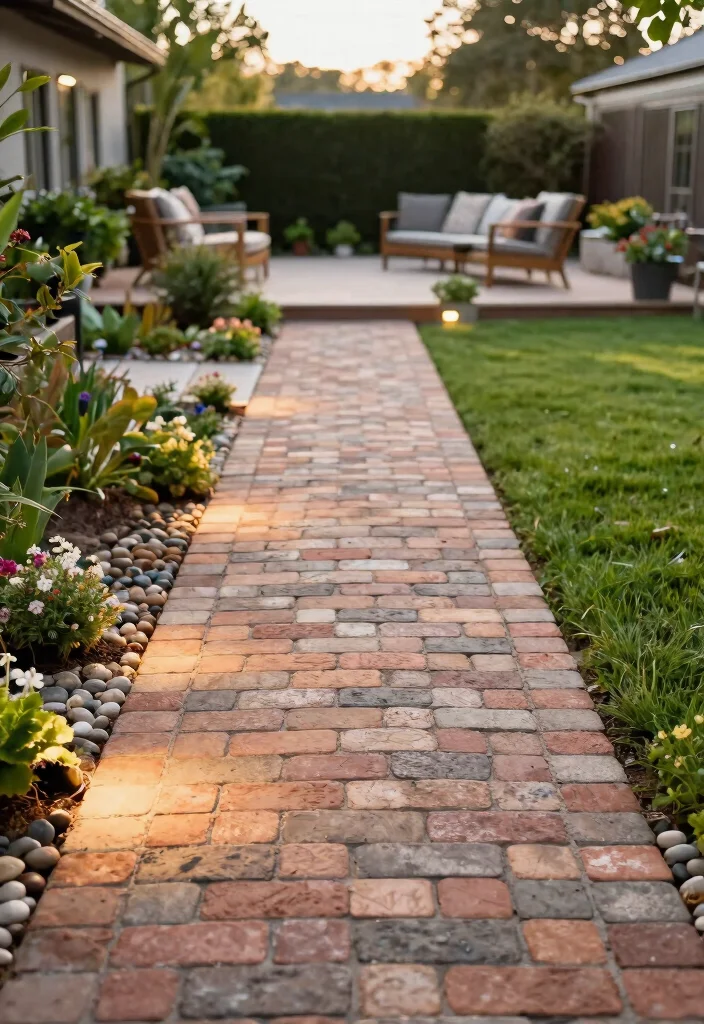
Aesthetic pathways leading to your brick paver patio enhance its charm and functionality. These pathways guide guests while keeping the main area clean and free of debris. You can design straight or gently curved paths using bricks that either match or complement your patio’s materials.
To ensure a level surface, excavate the pathway area and lay a solid base before placing the bricks. Filling gaps with gravel or ground cover plants softens the look and adds a natural touch. Consider installing lighting along the pathways for added safety and ambiance.
Here are some practical pathway ideas:
– Dig out and compact the pathway area for stability
– Fill gaps with gravel or plants for a softer look
– Add lighting for safety and charm
This thoughtful design not only creates an inviting approach to your patio but also contributes to overall aesthetic coherence.
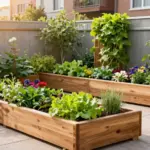
6. Integrated Planters Within the Patio
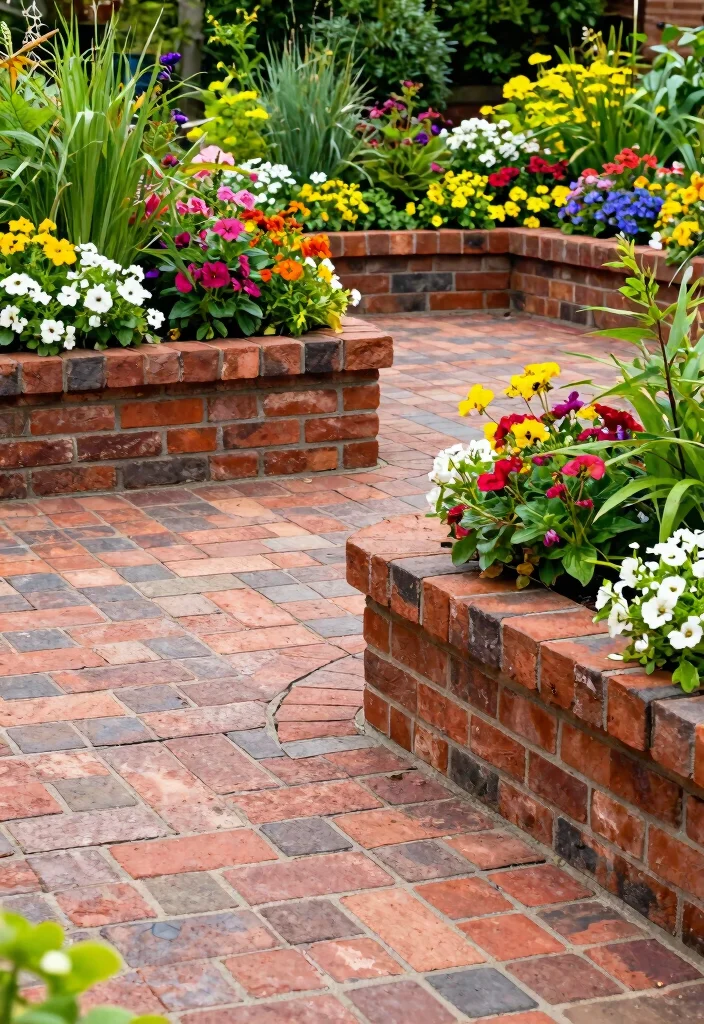
Incorporating integrated planters into your brick paver patio brings vibrancy and life to the hardscape. Designating sections of the patio for flowers, herbs, or small trees creates a beautiful blend of hardscape and softscape. This combination not only beautifies your space but also enhances drainage and airflow.
When designing, use bricks that match your patio for a seamless appearance. Consider raised planters built into the patio for added elegance. Ensure proper drainage holes to prevent water accumulation and support plant health.
Here are some design tips for integrated planters:
– Use matching bricks for a cohesive look
– Choose plants that thrive in your climate
– Incorporate mulch for moisture retention
This design not only enhances the patio’s beauty but also fosters a lively and inviting atmosphere.
7. Traditional Cobblestone Effect

For a classic touch, a traditional cobblestone effect can elevate your brick paver patio. Small, rounded pavers create a charming surface that seamlessly blends with both contemporary and rustic homes. The unique shapes of cobblestones offer a timeless look that’s both functional and appealing.
When working with sloped yards, ensure the base is compacted and level for optimal stability. The irregular sizes of cobblestones allow for snug fitting, minimizing shifting over time. Consider using sand between the stones to enhance stability and keep them secure.
Here are maintenance tips for your cobblestone patio:
– Regularly check for shifting and settling
– Use sand to fill gaps for added security
– Inspect edges for stability
This design choice adds a classic elegance while ensuring your patio remains functional and stable.
Fun fact: Traditional cobblestone patterns can keep a brick paver patio level in sloped yards. When the base is compacted and pavers are snug, shifting drops noticeably. Use irregular cobblestones for a snug fit that blends with both modern and rustic homes.
8. Mixed Material Appeal
Combining brick pavers with other materials creates a visually stunning patio that stands out. Consider integrating wood, stone, or gravel to add dimension and character to your outdoor space. For example, using wooden borders alongside your brick pavers softens the look while defining areas.
When mixing materials, ensure each type has a stable base to avoid shifting. Create a harmonious flow by selecting colors and textures that complement each other. Keep maintenance needs in mind, as wood may need sealing while stone typically requires less upkeep.
Here are some creative ideas for mixed materials:
– Use wood borders to soften the look
– Incorporate larger stones for added dimension
– Create pathways with gravel for drainage
This approach allows for a unique and inviting patio that showcases your personal style.
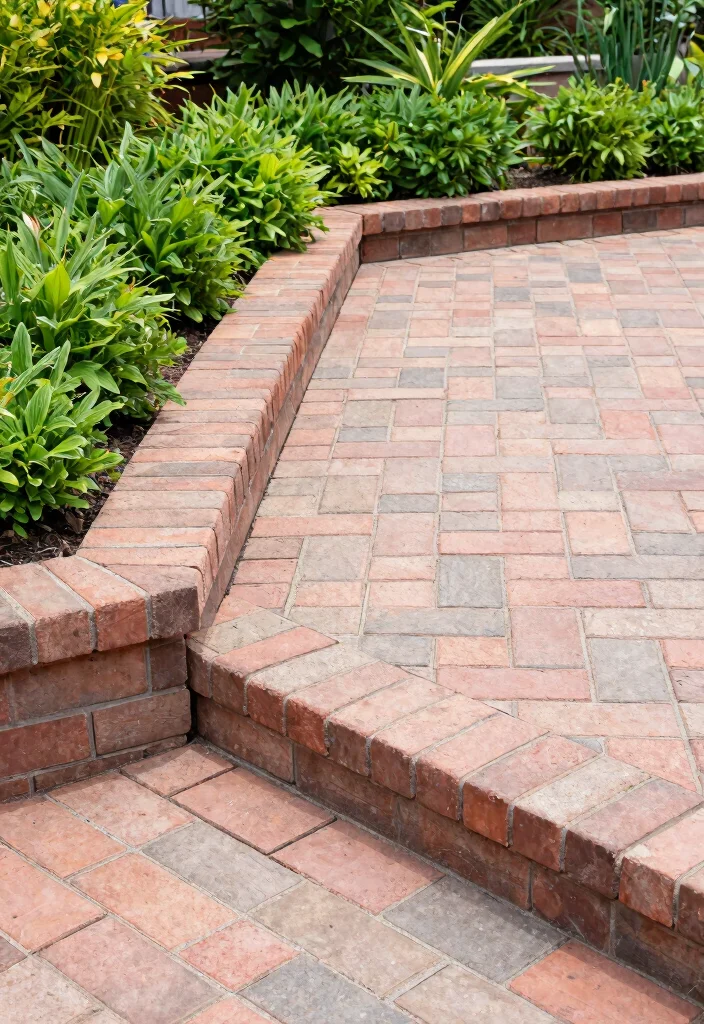
9. Stylish Bordering with Bricks
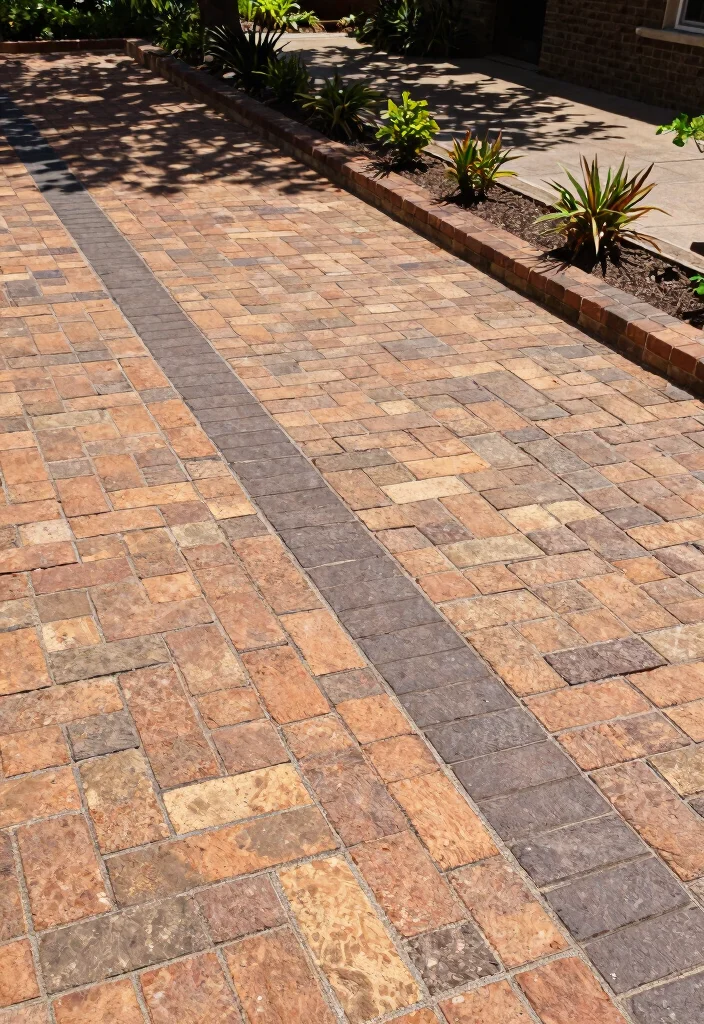
Adding a stylish border around your brick paver patio enhances its aesthetic and keeps everything organized. Use contrasting bricks to create a border that defines the patio area, adding visual interest and stability, especially in sloped locations. A well-constructed border ensures that the pavers stay in place and maintain their level.
When laying the border, choose bricks that harmonize with the main patio colors while standing out enough to create distinction. Secure the borders with concrete for added stability, ensuring a polished finish.
Consider these tips for stylish bordering:
– Use contrasting colors for visual impact
– Secure borders with concrete for stability
– Add decorative stones for extra charm
This thoughtful design not only frames your patio beautifully but also enhances its durability.
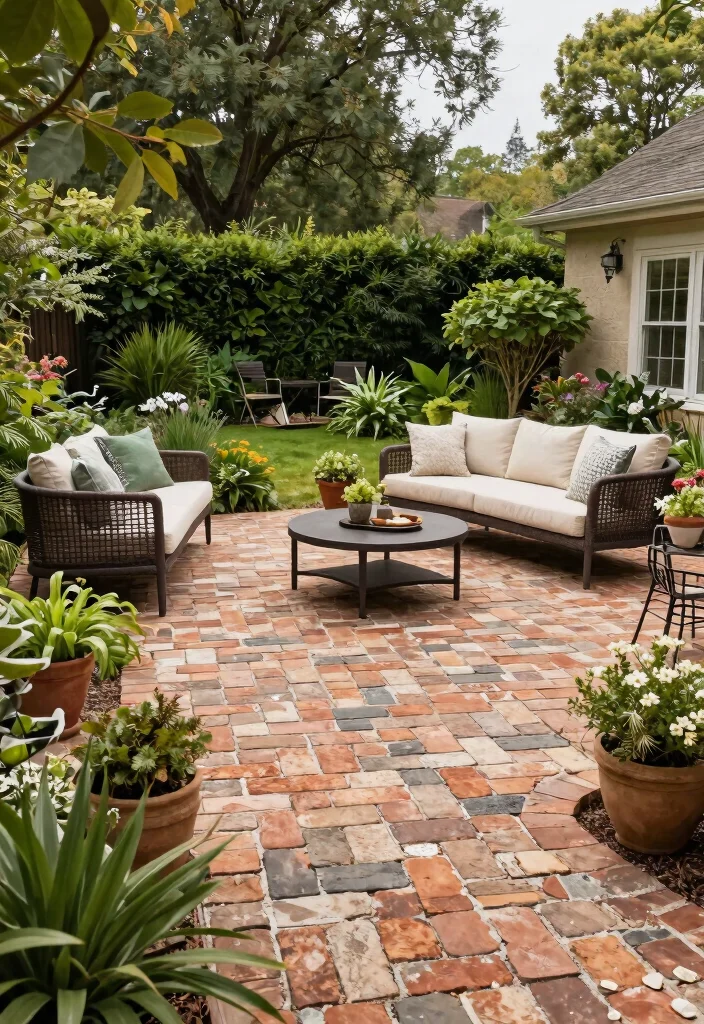
10. Patio with Built-in Seating
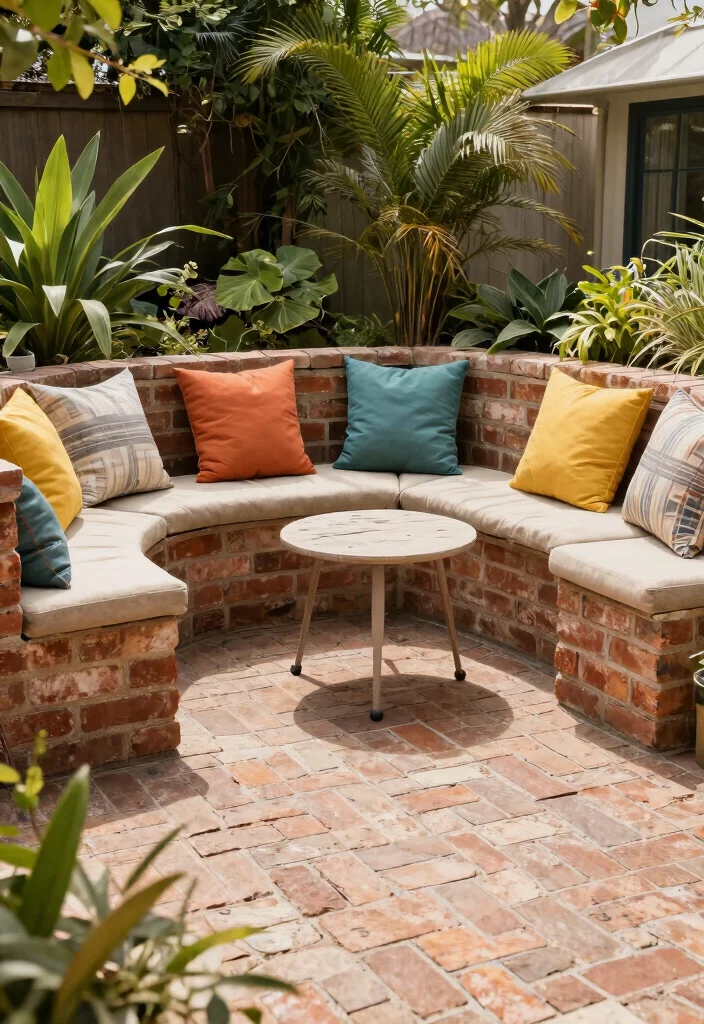
Integrating built-in seating into your brick paver patio maximizes space while boosting functionality. Using the same pavers for seating as those in the patio creates a cohesive look that’s less likely to shift. This design encourages comfort and social interaction during outdoor gatherings.
When designing, raise the seating slightly for comfort and add cushions for a cozy touch. Built-in tables can further enhance your patio’s social aspect, making it easier to host guests.
Here are some practical seating tips:
– Choose weather-resistant cushions for durability
– Ensure seating is slightly raised for comfort
– Integrate built-in tables for convenience
This design not only maximizes space but also creates a warm and inviting atmosphere for gatherings.
11. Pergola Partial Coverage
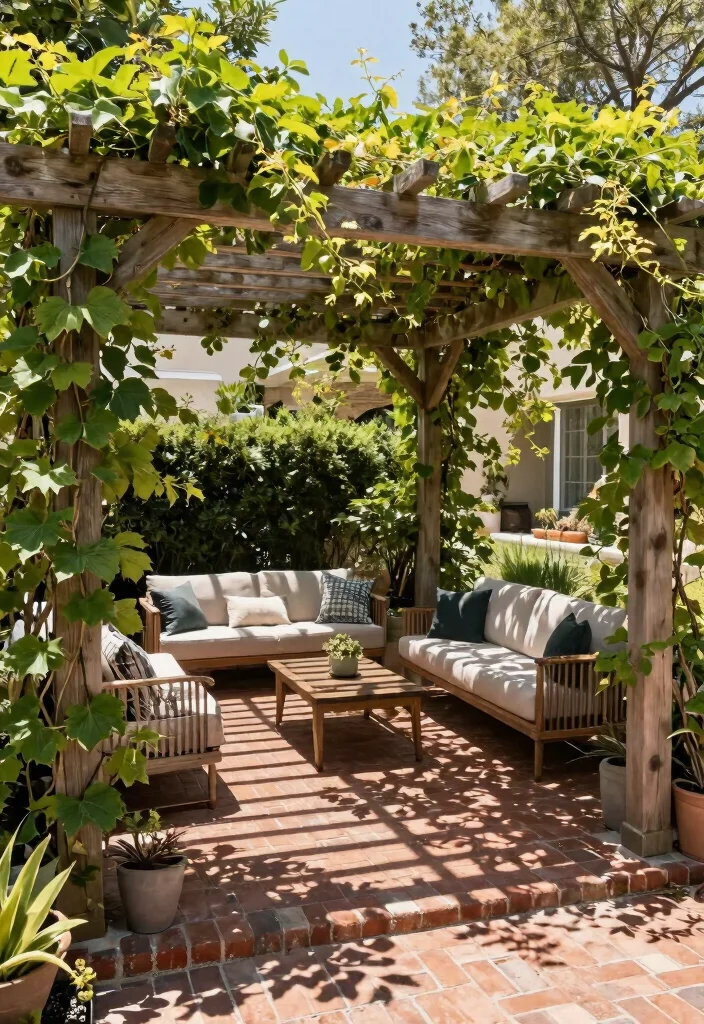
Adding a pergola above your brick paver patio provides shade while enhancing the overall beauty of the space. This structure allows you to enjoy your outdoor area even on sunny days. Ensure the pergola’s support is securely anchored to maintain the levelness of your paver patio.
Choose a pergola design that complements your home’s architecture and the patio materials. Incorporating climbing plants can add charm and enhance shade while creating a lovely backdrop.
Here are some maintenance insights for your pergola:
– Regularly inspect the structure for stability
– Trim climbing plants to maintain growth
– Ensure proper light penetration for comfort
This addition not only improves your patio’s functionality but also elevates its aesthetic appeal.
12. Textured Patterns for Interest
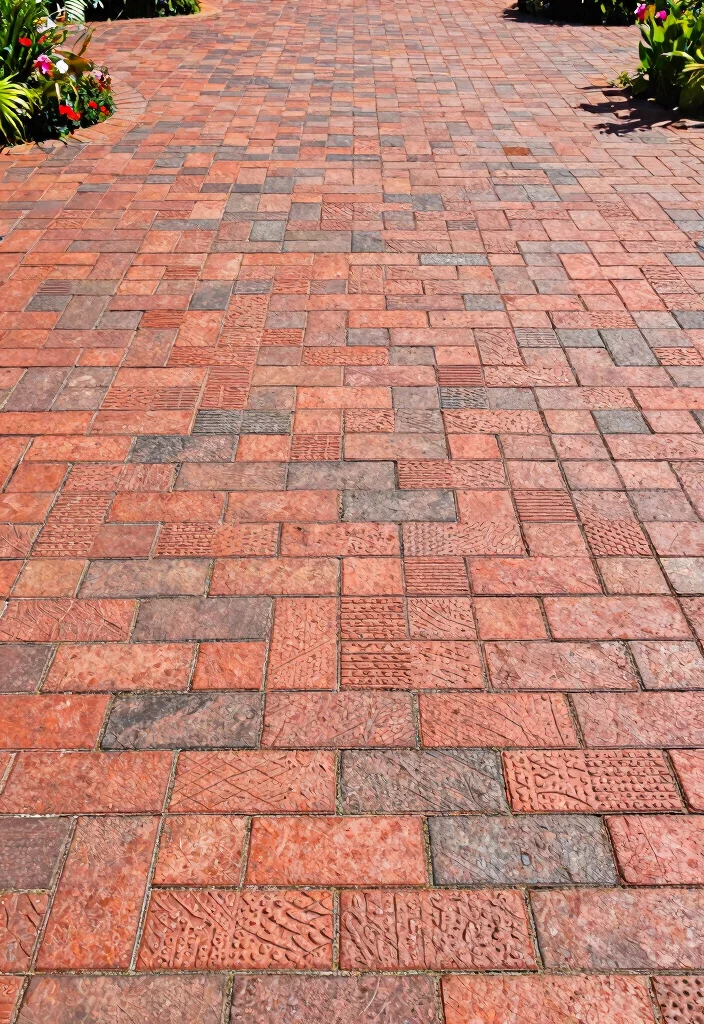
Incorporating textured patterns into your brick paver patio can significantly enhance its visual appeal. This can involve laying pavers in different orientations or utilizing bricks of various sizes to create unique designs. Textured finishes not only add interest but also improve grip, making the patio safer during wet conditions.
Start by establishing a solid base with compacted gravel or sand, adjusting as you lay the bricks to maintain levelness. Employ contrasting or complementary colors to make the patterns stand out.
Consider these design tips for textured patterns:
– Lay pavers in varied orientations for visual dynamics
– Use contrasting colors to highlight patterns
– Incorporate seasonal decorations for added flair
This design choice not only elevates the aesthetic of your patio but also ensures it remains inviting and functional.
13. Elevated Edges for Drainage
Implementing elevated edges on your brick paver patio enhances drainage, especially in sloped areas. By raising the edges slightly higher than the center of the patio, you promote water flow away from your home and reduce shifting risk. This design ensures that your patio remains functional during heavy rains.
When constructing, securely anchor the elevated edges with appropriate materials. Opt for a gentle slope toward flowerbeds or gardens, allowing water to be absorbed naturally. Using bricks with varying elevations can add visual interest and dimension.
Here are some maintenance tips for elevated edges:
– Regularly assess drainage patterns after rainfall
– Adjust elevations as needed to maintain effectiveness
– Check for erosion around edges to keep them intact
This strategy not only improves drainage but also ensures your patio remains stable and visually appealing.
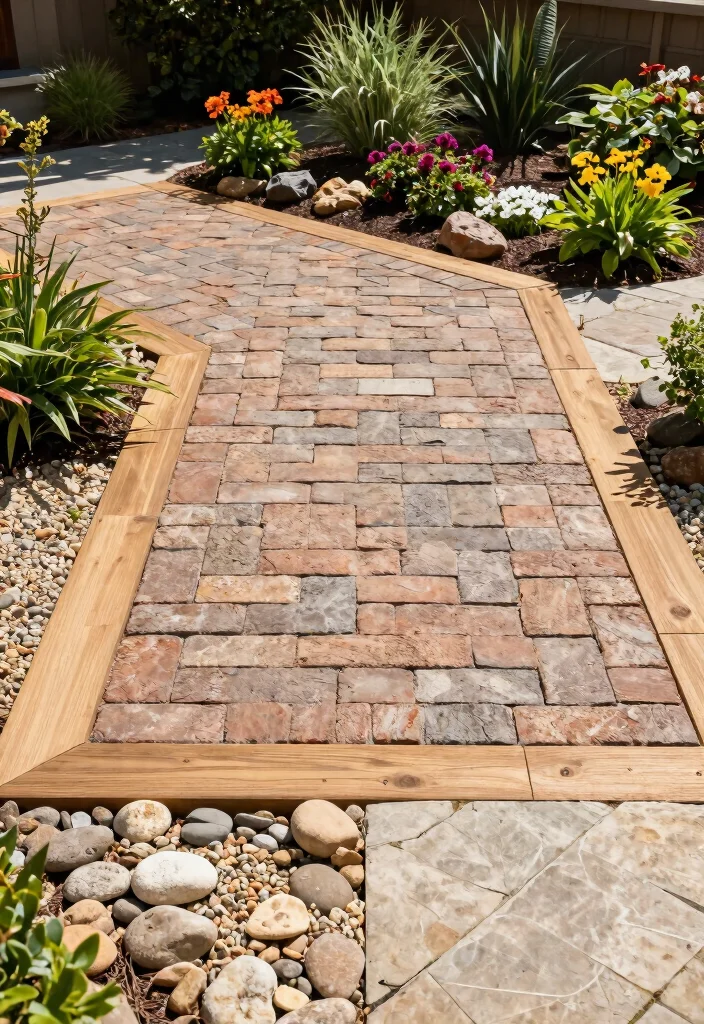
14. Custom Shapes to Fit Your Space
Creating custom shapes for your brick paver patio allows for a perfect fit in your unique outdoor space. Whether your yard is long and narrow or has unusual angles, customizing your patio maximizes functionality and visual appeal. This approach works wonders in sloped areas, permitting multi-tiered levels or cozy nooks.
Sketch your design first to visualize how the bricks will fit together. Mixing different paver sizes ensures a seamless blend while allowing for necessary adjustments to maintain a level surface. This flexibility lets you incorporate curves or unique patterns without sacrificing stability.
Consider these creative tips for custom shapes:
– Sketch designs to visualize the layout
– Use various paver sizes for a blended look
– Add lighting fixtures for personalization
This approach personalizes your patio while maintaining its functionality and aesthetic appeal.
❝ Custom shapes let your brick paver patio hug every nook—no more wasted space or awkward angles. Sketch first, mix different paver sizes, and watch the slope become a stunning multi-tiered retreat you actually use.
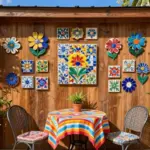
15. Seasonal Decor Enhancements
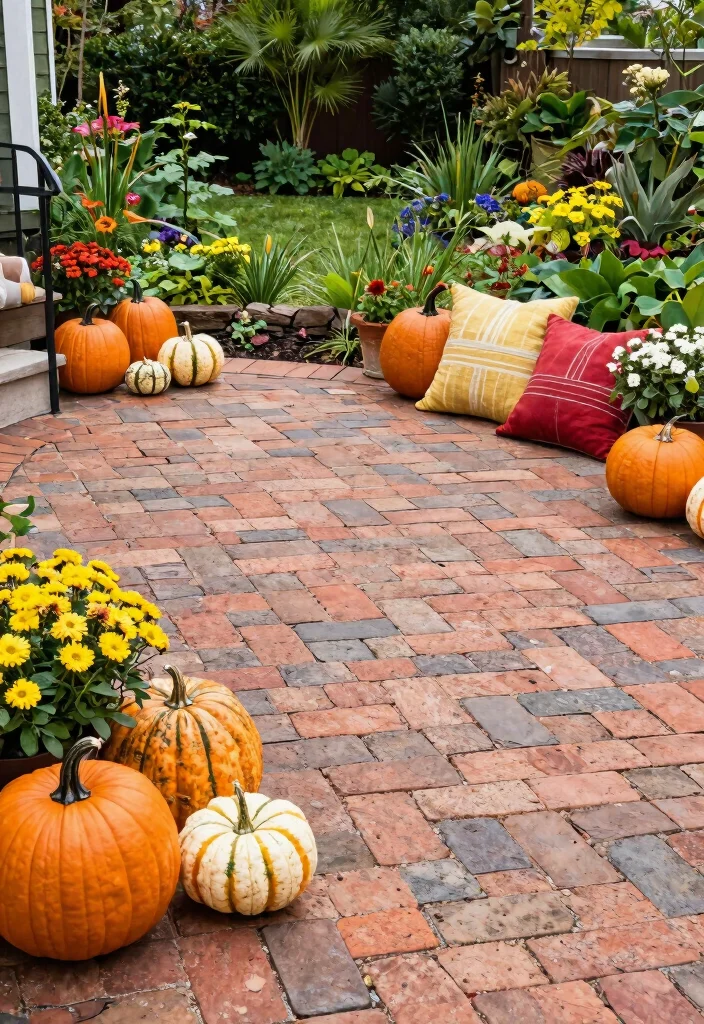
Incorporating seasonal decorations into your brick paver patio can transform the space throughout the year, keeping it fresh and inviting. From autumn pumpkins to vibrant summer flowers, seasonal decor enhances appeal while showcasing your personal style. This thoughtful approach can help stabilize pavers, as decorative elements disguise any shifting that might occur.
Consider using colorful outdoor rugs, cushions, or planters that reflect the current season. Adding wind chimes or lanterns can further enhance charm and create a cozy atmosphere for gatherings.
Here are some practical tips for seasonal decor:
– Regularly clean to maintain a fresh look
– Refresh decorations with the changing seasons
– Use vibrant colors to enhance visual appeal
This strategy not only keeps your patio looking inviting but also prolongs the life of the pavers.
Did you know seasonal decor can disguise up to 30% of visible movement on a brick paver patio? A few bold cushions, colorful rugs, and planters aligned to the season refresh the space and guide the eye. Rotate decor throughout the year to keep it inviting and steady.
Conclusion
Creating a stunning and stable brick paver patio doesn’t have to be a daunting task, even on sloped yards. By integrating these innovative ideas, you can design an outdoor space that is both functional and eye-catching. With careful planning and attention to detail, your patio can become the perfect area for relaxation and entertainment, enhancing your home’s overall charm.
Consider these designs as inspiration to kickstart your patio project today!
Frequently Asked Questions
How can I install a brick paver patio on a sloped yard without it shifting?
Getting a stable, level surface on a slope starts with a solid plan. For a brick paver patio that stays level, begin with proper drainage away from structures and excavate to install a durable base. Lay down geotextile, then a well-compacted sub-base of crushed stone (4-6 inches), followed by a 1-inch leveling sand bed. As you lay pavers, use a screed board and a level to keep each course even. Install continuous edge restraints to lock the perimeter in place, and consider terracing the slope with small retaining walls if the grade is steep. Finally, fill joints with polymeric sand and compact again. Regularly inspect after heavy rains and reseal or relevel as needed to maintain stability.
What are the best paver patio design ideas for keeping a level, durable outdoor living space on a slope?
Design ideas that keep surfaces level and visually appealing include: terracing the yard with low retaining walls to create multiple flat platforms; using a consistent paver patio design (sizes and patterns like running bond or herringbone) to minimize uneven appearances; planning drainage with a gentle slope away from the house and a possible French drain; adding built-in steps or landings between sections for easy, level transitions; choosing a uniform color to visually unify the space and hide minor height differences; and edging the patio to contain sand and stabilize the base. These concepts help you create inviting outdoor living spaces that stay level on a slope.
What maintenance tips help a brick paver patio stay level and attractive over time?
Keep your patio maintenance tips simple and effective: sweep regularly to remove debris; re-sand joints every few years to lock the pavers in place; clean stains with a mild cleaner and a soft brush; consider sealing when recommended to protect against weather; check for settled pavers and reset them as needed; inspect edges for looseness and reinforce as necessary. Regular care helps your brick paver patio stay level, safe, and attractive for years to come.
What factors should I consider for landscaping around a brick paver patio on a slope?
Think about drainage, soil stability, and erosion control first. Plan with landscaping ideas that direct water away from the patio, use retaining walls or ground covers to stabilize slopes, and pick plants with non-invasive roots to avoid lifting pavers. Include edging and appropriate irrigation to prevent water pooling on joints. Integrate planters and seating zones to make your outdoor living spaces cohesive and functional while keeping the brick paver patio level and comfortable.
Are there alternative outdoor flooring options that pair well with a brick paver patio in sloped yards?
Absolutely. You can pair a brick paver patio with other outdoor flooring options like natural stone, concrete slabs, wood or composite decking, or decorative gravel paths. Aim for a cohesive color palette and consider transitions that maintain level surfaces where possible. Mixing textures can add visual interest on a slope while keeping maintenance practical and the overall design harmonious with your paver patio design goals.
Related Topics
brick paver patio
outdoor living spaces
landscaping ideas
paver patio design
DIY installation
sloped yard solutions
patio maintenance tips
easy outdoor flooring
home improvement
beginner friendly
seasonal landscaping
durable patios